How to Make a Picture a Template in Powerpoint
Custom PowerPoint template designs are a very hot item these days, and a fast-growing design category at 99designs. Clients are looking for unique presentations that reflect their branding and make their ideas look professional and credible—that'due south where they need a talented designer like yourself to create ane for them.
PowerPoint does take graphic editing capabilities, but some designers observe information technology easier and faster to create the main graphic elements in Adobe Illustrator or Photoshop first, and export them into the PowerPoint template to combine with editable elements.
In this tutorial we're going to use Adobe Illustrator to create the design, which we volition and so export and alter in PowerPoint. Here's how to create a powerpoint template blueprint:
1. Create your basic template
Outset in Illustrator by creating a new document: File > New. I recommend starting by setting the dimensions to the default PowerPoint size of ten 10 7.5 inches or 720 x 540px, a 4:iii attribute ratio. Additionally, you should decide whether or not your client is as well going to need a sixteen:9 template, the other standard attribute ratio for PowerPoint.
In this tutorial my PowerPoint Template will accept 4 slides, so I've set my number of fine art boards to 4 and I've created one Championship slide, two Content slides, and 1 Cease slide. Delight note, this number was selected as merely a sample! Your design may accept many more types of slides depending on the requirements of the pattern brief.
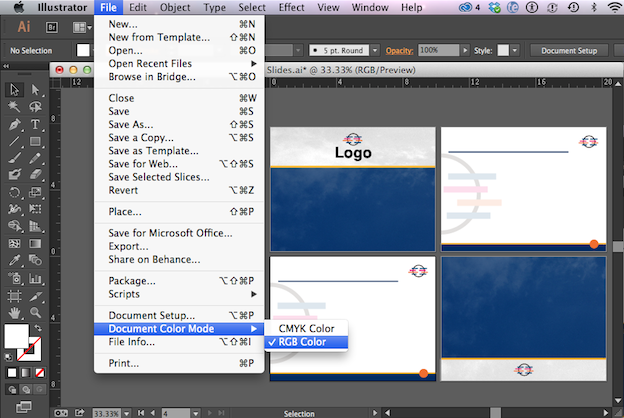
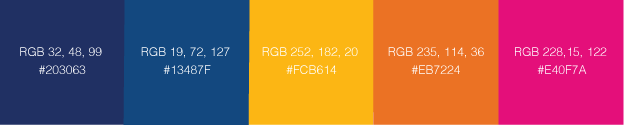
Make sure that your document color mode is set to RGB, by checking File > Document Colour Mode >RGB, because these colors are but going to be seen on a screen. Pick out a color theme that will lucifer your client'due south branding. For this example I've chosen 5 colors, many of which lucifer my logo:
Call up that the designs you're creating in Illustrator or Photoshop volition not be editable in PowerPoint, and so annihilation you lot include in this graphics portion of the template is going to be the same for every slide you use information technology in. Here are three central tips for optimizing your design for use in PowerPoint:
- Brand sure to select a font for the content in your PowerPoint slides that your client is likely to have already, for case one of the fonts that come with Microsoft Office or Adobe Font Page. I've chosen Helvetica. If you lot're using a less common font, make certain that you send the customer the licensing data so that they can legally obtain that font, because they'll need it in order to edit the content that will be displayed in that font.
- When creating your PowerPoint template graphics in Illustrator or Photoshop only include text as placeholder and DO NOT include any text in your design when you're exporting it. Your customer has no use for raster images of text, the bespeak is for them to exist able to edit the text boxes themselves. You can add the editable text box in PowerPoint later.
- Don't create graphs, tables or complex information visualizations that demand to be customized past your customer in Illustrator or Photoshop, equally PowerPoint has those features so you tin can create them there.
2. Consign your designs as PNG files
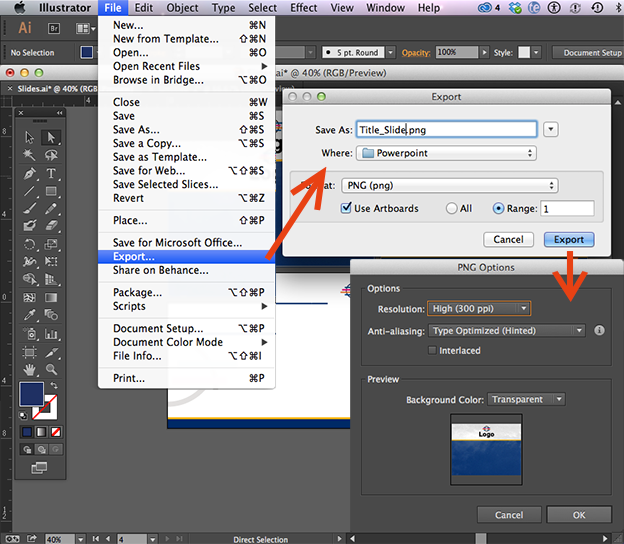
Export each art lath into its own PNG file by clicking File > Export > PNG > Consign > OK. If you lot're working with multiple art boards in Illustrator make sure to cheque "Use Artboards" to specify which art board to export to each PNG file. Make certain y'all ready each PNG to a transparent background with a resolution of 300 PPI.
3. Create a new presentation in PowerPoint
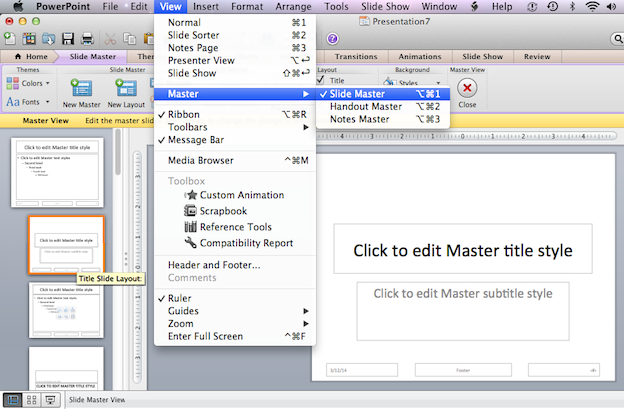
Caput over to Powerpoint at present, and click File > New Presentation. Then go to View > Primary> Slide Master. Now you lot're in a viewing mode where you tin edit and create Slide Masters. Slide Masters are a hierarchy of slides storing information most the theme of a presentation.
Yous'll notice that a carte du jour of Master Slides on the left has several types of templates for you lot to choose from. Since we're going to create a Title Slide next, click on the Title Slide Layout option in the left carte.
4. Create your Title Slide Chief
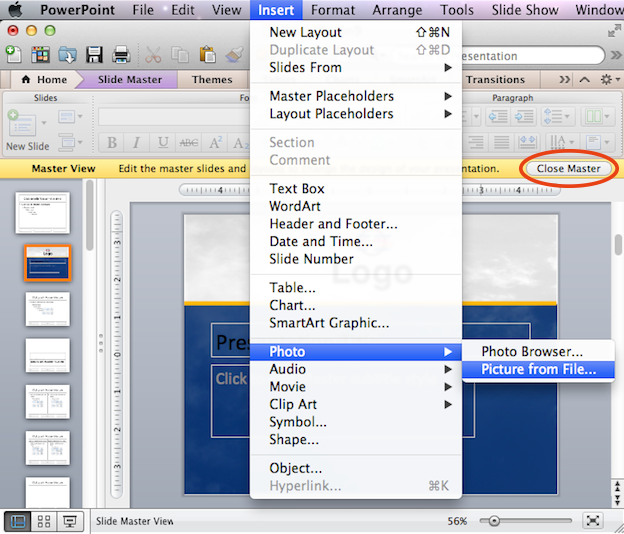
Now we desire to import the artwork we've created in Illustrator into the Title Slide Master. Do this by clicking Insert > Photograph > Movie from File > Select your PNG file. Now your PNG file volition appear in your Title Slide Master. Adjacent, click Adjust > Send to back so that the artwork is moved to the bottom layer, and text boxes are on top.
Position and edit the text boxes as desired, then click Close Master to go back to normal view mode. Now your custom Title Main Slide has been added to your drove of Master Slides in your PowerPoint certificate.
5. Create your content slide masters
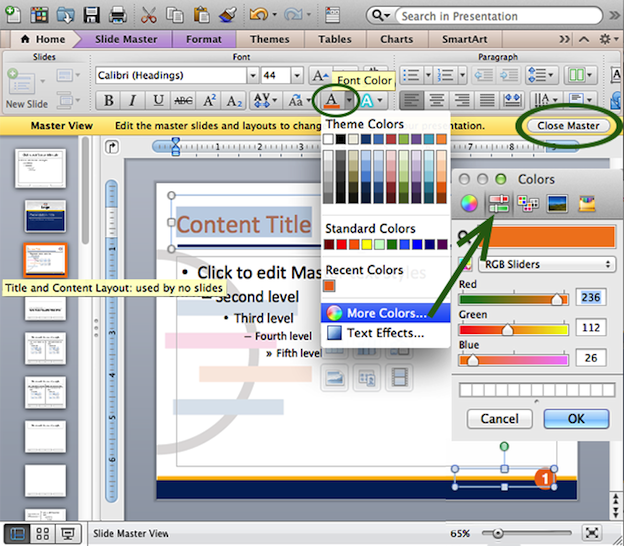
Again, open up up your Slide Master. In the slide master bill of fare, select the Championship and Content Layout template. Insert your PNG file and send information technology to the back, so you lot can position and style your text boxes against the background of your PNG pattern, using the text editing option in the tool bar at the acme.
To apply custom colors to any text or graphics, select the Fill Colour option and click "More Colors…" from the resulting driblet-down menu. Click the RGB Sliders button and fill in the specific RGB number values in order to apply your custom colour palette as desired. When you lot've finished styling your content, click Close Master to go back to normal view way.
If you want to add editable graphs or tables at this bespeak, simply select from the options in the Charts and Tables tabs at the top. You and your client will demand Microsoft excel to edit the data in those charts and table.
six. Create your concluding slide

Return to the Slide Master window and click New Layout, which will give you lot a simple default Master Slide with 1 championship text box and some footer text boxes. Delete the footer text boxes.
Nosotros're going to re-name this slide past clicking Rename and entering "End Slide Master Layout" in the resulting text box. This is and then that your client tin can see that this slide as the last slide in the presentation.
Next, insert your PNG and send it to the dorsum, and style your cease slide text as desired. Click Shut Main, which will add this finish slide into you lot Chief Slide collection.
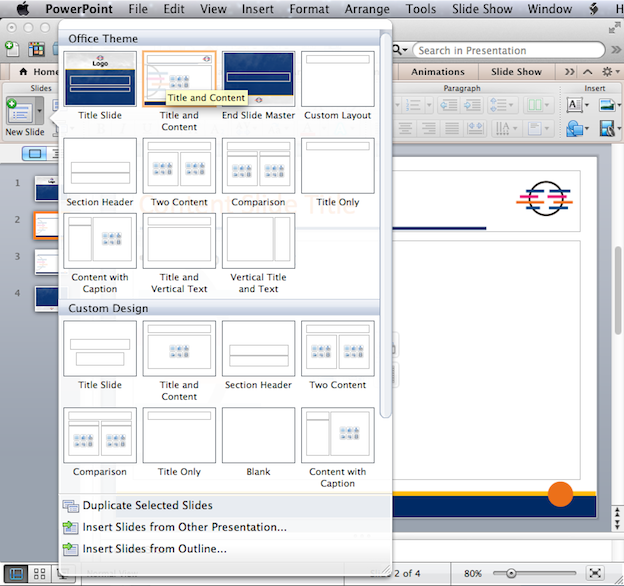
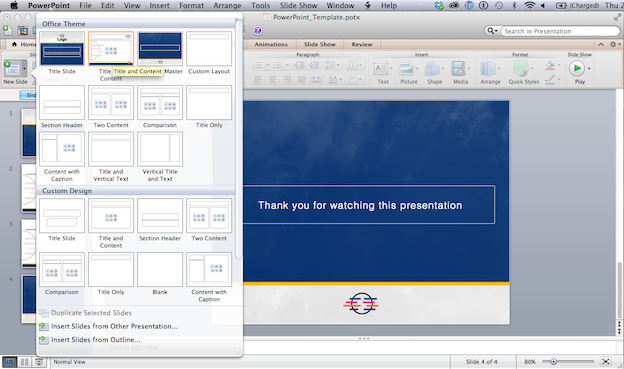
7. Mix and match your Master Slides
8. Save information technology as a template
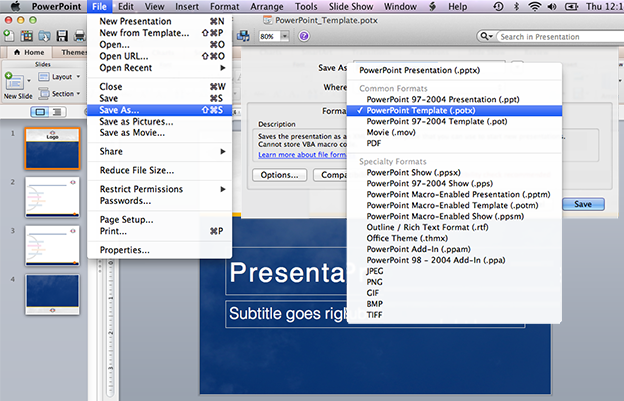
Do this by clicking File > Save As > PowerPoint Template (.potx). Now you lot can send your PowerPoint Template to your customer! Whenever they double-click this template, an entirely new document will be created — ane that contains the presentation you've just created and its Master Slides:
All your customer has to practice is click New Slide and select the Master Slides of their choice from the resulting drop-down carte du jour. Now your customer can mix and match and edit their branded PowerPoint Template yet they want to:)
Need a custom PowerPoint template?
Our global community of professional person graphic designers tin do that!
DOWNLOAD HERE
How to Make a Picture a Template in Powerpoint TUTORIAL
Posted by: susantheseed.blogspot.com


Comments
Post a Comment